DimensioneX/NetBeans 691
back to DimensioneX WIKI main and Italian WIKI
This article describes how to open, run and possibly edit/modify the DimX source by using NetBeans 6.9.1 and Apache Tomcat 6
The technique may work also on other versions of NetBeans.
Step by Step guide
Preparing NetBeans
1. Download a proper JDK (I got Java 6 update 22), install it
2. Download NetBeans 6.9.1, get the bundle with Tomcat inside
3. Install, choose Personalize, select Apache Tomcat instead of Glassfish.
4. Wait until install finishes
Preparing DimX Sources
5. Download a fresh copy of dimx, unpack it
6. Please verify under dimx/WEB-INF/classes/cleoni/adv/ there is some .java files. If not, you probably got a dimx package which does not contain the sources (it happened to me) in this case just get another version, usually dimx packages contain sources.
7. Move the dimx folder to a specific location where you will be editing it (I chose C:\Dev\dimx)
8. With your explorer tool open the dimx\WEB-INF folder and rename web.xml to web_bak.xml, then web_netbeans_351.xml to web.xml so NetBeans will be using it during import
9. Inside dimx folder, create a META-INF folder 10. Inside the META-INF folder ou just created, make a text file, paste these lines inside:
<?xml version="1.0" encoding="UTF-8"?>
<Context antiJARLocking="true" path="/dimx"/>
save it and rename this text file to context.xml. NetBeans will need it.
Importing DimX Sources
11. Start NetBeans
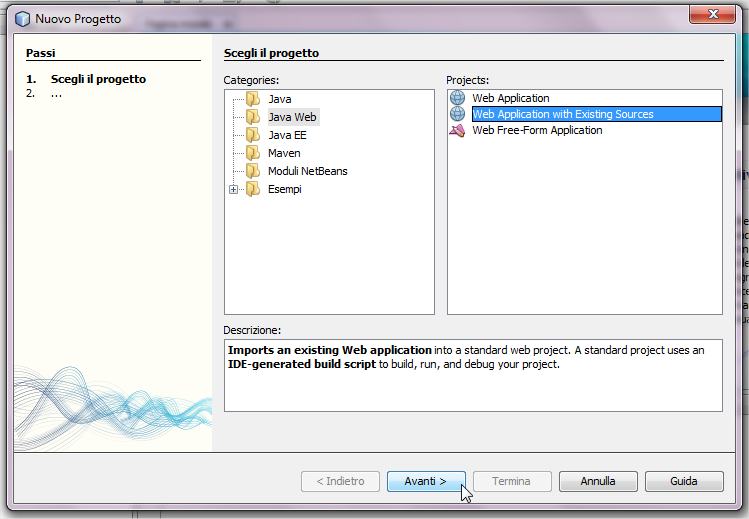
12. Menu: New Project
13. Choose Web App from existing soruces
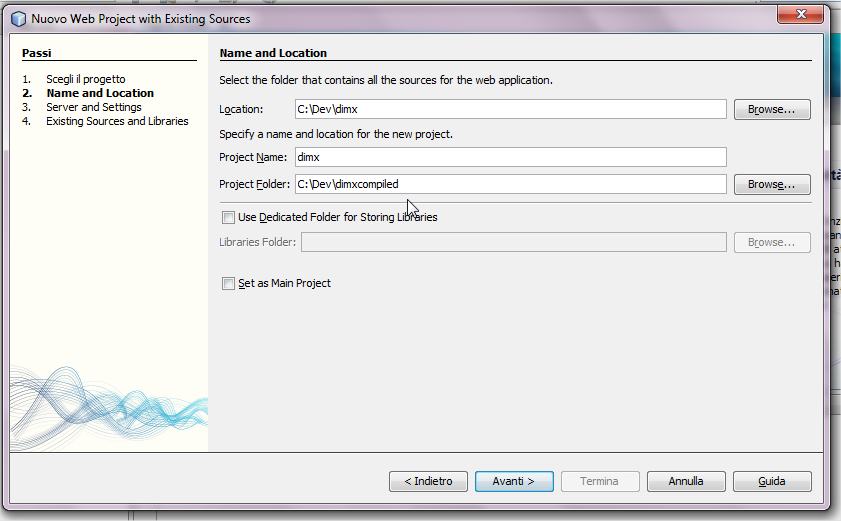
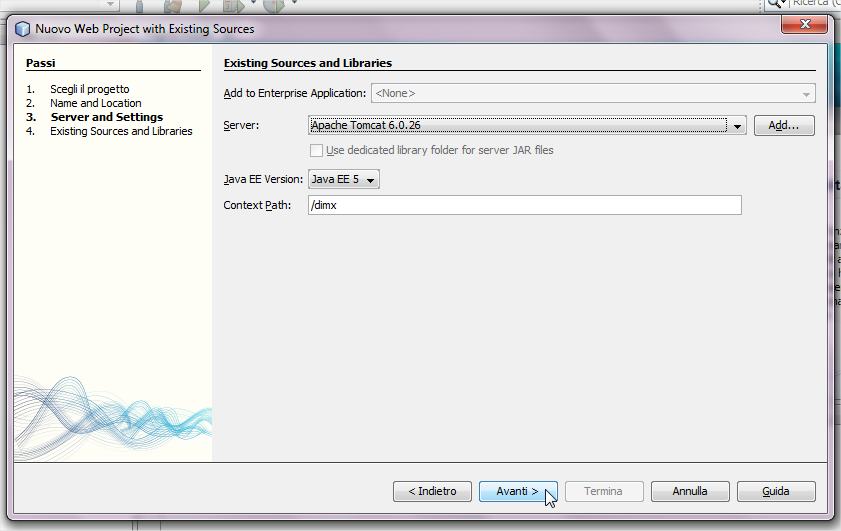
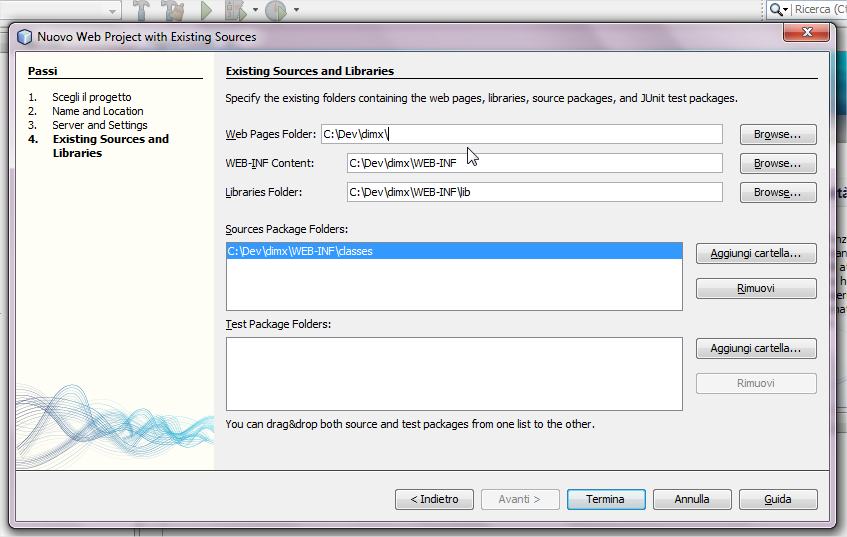
14. Follow steps as depicted below.
Please note that destination (project) folder will be dimxcompiled. Here NetBeans will produce dimx's compiled classes for you to use.
Click Finish at the end of the wizard.
15. If asked, answer "DELETE" to allow deleting and rebuilding the existing classes (classes will be recompiled using the current JDK)
So far, you should get no errors
Running and editing Dimx under NetBeans / Tomcat 6
16. Switch to file view, open the web module tree from the left pane (here is where you should work on sources) 17. From the left pane, open WEB-INF/classes/cleoni/adv folder, doubleclick multiplayer.java - verify in the comments at the beginning of the file, and in the myVersion variable down below, that you are working on the intended version
18. Try Clean+Build command, verify no errors still
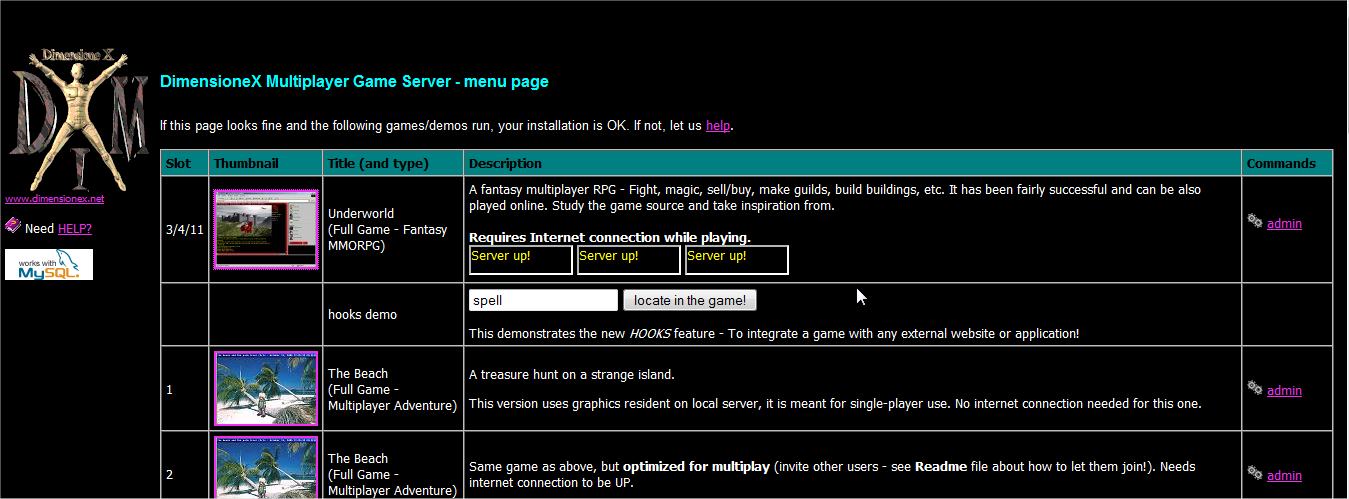
19. Run project. If everything is OK you should get the browser opened and the welcome screen:
You are ready to navigate in the games (try clicking the underworld thumbnail)
20. Okay, you are now running Dimx under NetBeans / Tomcat 6
21. Go back to the multiplayer.java and try changing the version number (myVersion variable). Do Build again and verify it has changed. Great, you are able to modify DimX. Have fun!
- back to DimensioneX WIKI main

